Flutter : Animation 2
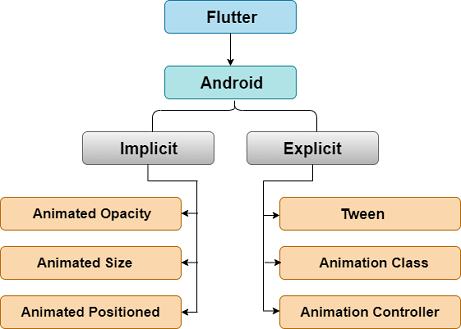
Now, we are going to see how we can create explicit animation in Flutter. There are mainly three pillars of an animation, which are given below:
- Ticker
- Animation Class
- AnimationController
Ticker
The Ticker is a class which sends a signal at a regular interval, i.e., around 60 times per second. You can understand it with your watch, which tics at regular intervals. At each tick, Ticker provides a callback method with the duration since the first ticks at each second, after it was started. Even if the tickers started at different times, it always synchronized automatically. The reason behind this is that the tickers give their elapsed time relative to the first tick after it was started.
Animation
The Animation class is the core building block of the animation system. The animation is nothing else, but it represents a value (specific type) that can change over the lifetime of an animation. In Flutter, the widgets which perform an animation take an animation object as a parameter. This Animation object gives the information from which they read the current value of the animation and to which they listen for changes to that value. The animation class contains two methods addListener() and addStatusListener(). When the value of animation changes, it notifies all the listeners added with addListener(). Again, when the status of the animation changes, it notifies all the listeners added with addStatusListener().
The most common Animation classes are:
- Animation<double>: It interpolates values between two decimal numbers over a certain duration.
- Animation<Color>: It interpolates colors between two color values.
- Animation<Size>: It interpolates sizes between two size values.
Animation Controller
The animation controller is a class that allows us to control the animation. It always generates new values whenever the application is ready for a new frame. For example, it gives the controlling of start, stop, forward, or repeat of the animation. Once the animation controller is created, we can start building other animation based on it, such as reverse animation and curved animation.
- animcontroller = AnimationController(vsync: this, duration: Duration(milliseconds: 2500));
Here, the duration option controls the duration of the animation process, and vsync option is used to optimize the resource used in the animation.
The basic steps necessary for using an AnimationController are:
Step 1: First, instantiate an AnimationController with parameters, such as duration and vsync.
Step 2: Add the required listeners like addListener() or addStatusListener().
Step 3: Start the animation.
Step 4: Perform the action in the listener callback methods (for example, setState).
Step 5: Last, dispose of the animation.


Comments
Post a Comment